Motorola’s excellent mid-range handsets, the Moto G5 and Moto G5 Plus, are now on sale in most of the major markets of the world. For their price, you simply cannot go wrong with these handsets.
If you recently got a Moto G5 or G5 Plus, check out some tips and tricks for the devices to help you get the most out of them.
While the Moto G5 and G5 Plus continue to run on a stock version of Android, Moto has included a few useful enhancements that are worth knowing about. Plus, there are a few things about the devices that you should know. Make sure to check out our list of the top tips and tricks for the Moto G5 and G5 Plus below to know about them.
One-hand mode
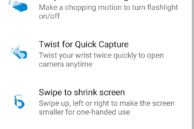
The Moto G5 Plus comes with a 5.2-inch Full HD display. While smaller than other phones in the same category that usually sport a 5.5-inch panel, the design of the G5 Plus makes it a bit too difficult to reach the extreme corners of the display. Thankfully, Moto had the foresight of including a one-handed mode on the G5 Plus. Dubbed ‘Swipe to shrink screen’, the feature essentially shrinks the display elements to make it easier for you to reach UI elements located on the extreme corners.
Before you can use ‘Swipe to shrink screen,’ you will have to enable it from the ‘Moto’ app after which you can enable the feature anytime by swiping up, left, or right from the bottom of the screen while anywhere in the OS. Depending on how you swipe, the shrunken screen will show up on the left, right, or middle of the display.
Unlimited Photo backup
To complement the excellent camera setup of the Moto G5 Plus, Moto and Lenovo are also offering free unlimited storage on Google Photos at native resolution with the device for 2 years. This means that for 2 years since you purchase your Moto G5 Plus, all the photos and videos, including those shot in 4K, will be uploaded in their original quality to Google’s server and the space occupied by them will not count against your Google account’s storage space. This, however, is only applicable for photos and videos that are uploaded directly from the handset.
If you are not already, make sure to use Google Photos to backup all your photos and videos. Not only will you be able to save your memories at a safe place, Google Photos will also make it easier for you to manage your photo library as it will automatically sync it with other devices. Open the Google Photos app on your Moto G5 to enable the backup and sync functionality.
Moto Display
Moto Display first made its debut on the Moto X (2013) and since then the feature has become common in the company’s flagship and mid-range devices. However, if you receive a lot of notifications, Moto Display can get a bit irritating to have. Plus, privacy freaks will obviously don’t want their private emails or messages to be displayed on Moto Display.
Moto was smart enough to include certain customisation options in Moto Display for this exact same purposes. Open the Moto app and proceed to the Display section. Here, you will find options to customise the content and notifications being displayed from apps in Moto Display, including being able to block some of them altogether.
One button nav
Unlike most of the other devices in the mid-range category, the Moto G5 and Moto G5 Plus feature on-screen navigation keys. Since they already come with a display that is smaller than their competition, the use of on-screen navigation bar means that the effective viewing area is reduced even further. With the new One button nav feature on the Moto G5 and G5 Plus though, you can easily hide the navigation bar to expand the effective viewing area.
The feature makes use of the fingerprint scanner in the front for navigating around the UI, with a swipe to the left on the scanner acting as a back button while a right swipe will bring up the Recent apps view. Tapping on the scanner will make it act like a home button. One button nav might seem a bit unintuitive at first, but once you get used to it, there is no going back.
One button nav can be enabled from the Actions menu in the Moto app.
Display Density
One of my favorite new features in Nougat is the ability to change the display density to adjust the amount of content being displayed on the screen. This is different from changing the font size. While it was possible to change the display density on previous Android devices as well, it required root access or playing around with some adb commands. Now that the feature is baked right into Nougat, Moto G5 and G5 Plus owners can easily change the display density to display more content on screen. By lowering the display density, you can display more information on the Moto G5’s display, while increasing it will make all content on the screen bigger and easier to read. Changing the DPI is more than just about increasing or decreasing the font size.
To change the display density on your Moto G5 or Moto G5 Plus, head over to Settings -> Display size and depending on your preference, change it to ‘Small’ or ‘Larger’.
Gestures
Similar to previous generation flagship Moto devices, the Moto G5 and Moto G5 Plus come with plenty of gestures that can be used to quickly achieve certain tasks or open certain applications. Some of the gestures below are also found on other Android devices, while others are exclusive to Moto devices.
Below is a list of all the available gestures on the Moto G5 and G5 Plus:
- Twist for Quick Capture: Moto’s iconic screwdriver-like twisting gesture is present on both G5 variants to quickly open the camera app. The same gesture can be used to switch between the front and rear shooters with the camera app open
- Chop Chop: With the Moto G5 or G5 Plus in your hand, imitate the chopping gesture twice to quickly toggle flashlight on or off
- Stop ringing: Your phone will automatically stop ringing — but continue to vibrate — when you pick it up
- Do Not Disturb: You can quickly silence any incoming call or notification by putting the phone face down on a table
You can individually toggle each gesture on/off from Actions under the Moto app.
Move Apps to SD Card
Motorola is offering the Moto G5 and G5 Plus in a bunch of different configurations across the world. While most of the variants feature 32GB of internal storage, there are still a few variants of the handsets being sold that come with only 16GB of storage. Once you account for the space occupied by the OS and system apps, the 16GB variant of the Moto G5/Plus is left with only around 10GB of storage which is clearly insufficient in this day and age.
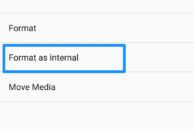
Thankfully, since the Moto G5/Plus feature an SD card slot, you can easily insert one in the handset and move apps to SD card to free up storage space on the internal disk. The process is slightly more convoluted than before due to Adoptable storage, which is a useful feature to have once you get the hang of it.
You can find the steps to move apps to SD card and read all about Adoptable storage below.
Read: How to Move Apps to SD Card on Moto G5 and Moto G5 Plus
Switch to Professional Mode
The Moto G5 and G5 Plus both feature excellent rear shooters for their respective price range. The G5 Plus, in particular, features a camera setup that is very similar to what is found on the Samsung Galaxy S7. The excellent camera setup on the handsets is paired with an equally able and simple to use camera app.
However, if you know a thing or two about photography and know what ISO, shutter speed, and exposure means, you can extract the very best image quality from the Moto G5’s shooter by switching to the manual mode while shooting photos. Dubbed Professional mode, you will be able to control almost every aspect of the camera under this mode thereby allowing you to have full control over the final image output.
Lock/Unlock Apps using Fingerprint scanner
The Moto G5 and G5 Plus come with a fingerprint scanner at its front that can be used for quickly unlocking the device. Apart from One button nav feature, Moto has not used the fingerprint scanner on the handsets to offer any additional functionality like locking/unlocking apps.
Nonetheless, due to the presence of proper APIs, third-party apps like LastPass and 1Password are also able to take advantage of the fingerprint scanner for verification purposes. But did you know that you can also use the fingerprint scanner on the Moto G5 and G5 Plus to lock/unlock applications? Using an app called App Lock, you can lock apps and then only unlock them once your fingerprint is verified.
Read: How to lock apps using fingerprint scanner on your Android device
TurboPower
The Moto G5 and G5 Plus features Motorola’s TurboPower technology that allows them to last an additional 6 hours with only 15 mins of charging. However, this speedy charging is only available when you charge the Moto G5 and G5 Plus using the stock TurboPower charger that Motorola bundles with them in their retail packaging.
Sadly, using any other Quick Charge compatible charger will not charge the handsets faster than using any other 2A charger. So, whenever you are travelling, make sure to carry the G5/Plus stock charger with yourself.
What are your favorite tips and tricks for the Moto G5 and G5 Plus? Drop a comment below and let us know about them!
