The Indian government today in its bid to push cashless transactions across the company today launched the Bharat Interface for Money a.k.a BHIM application for Android devices. The app has a very simple and ease to use UI, which will help widen its adoption among new smartphone users and small traders.
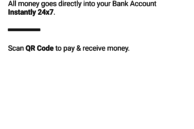
Unlike Paytm and other similar services, BHIM is directly linked to your bank account and is not a wallet service. This means that any money you send or receive will be directly debited or credited from your linked bank account. Compared to IMPS, RTGS, and NEFT, using BHIM is simple and easy to use. To send money to someone, you can simply scan a QR code or enter their custom payment address that can be set up from within the app. There is no need to know one’s bank account number, IFSC code, or other such details.
For now, there is a restriction of Rs 10,000 per transaction and Rs 20,000 within 24 hours while using BHIM. There are no charges for using UPI as of now, though this might change in the future. Since UPI and BHIM are relatively new, mass adoption will take time. BHIM and UPI are supported by 31 banks, with the app switching to traditional IMPS for banks that don’t have UPI support.
If you are wondering how to get started with the BHIM app, check out the steps below:
Step 1: Download the BHIM app from the Google Play Store. When you first open the app, you will be prompted to choose between English or Hindi language. Tap Next after selecting your preferred language. You will now be greeted with a BHIM splash screen. Proceed to the next step by tapping Next.
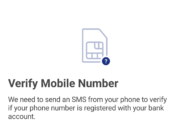
Step 2: To start using the app, you will have to grant it access to SMS/MMS and phone state. This step will only show up on Android devices running Marshmallow or higher. Proceed to grant the required permissions to the app. You will also be prompted to select the appropriate SIM card from which a message will be sent to your bank for verification purposes. Make sure to select that SIM whose number is registered with your bank. This SMS will incur a charge of Rs 1.5.
The account that is already linked to your UPI profile/Aadhar will automatically be selected. If not, you will be prompted to link your bank account with your UPI account.
Step 3: Once the number is verified, you will have to set up a 4-digit passcode. This will prevent unauthorised use of the app as you will have to enter it every time you open it.

With BHIM now set up, you can use the app to easily send/receive or request money from someone. If you want to know your UPI payment address or want to add another one, you can do it from the Profile section of the app. By default, your “phonenumber@upi” is your UPI payment address. If you want, you can also create a custom payment address. You cannot have more than 2 UPI addresses though. You can give this address to anyone using UPI to quickly and easily send payments to you. Additionally, you can also share the QR code with them using the Share option located below it.
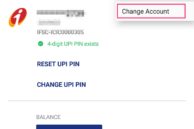
To find which bank account is linked to your UPI account, head over to the Bank Account section of the app. You can also request and find the balance of the linked account, though you will have to enter your UPI PIN for verification purposes. If you want to change the linked account, tap the 3-dot overflow menu button located on the top right corner and select the Change account option.
The Transactions section of the app provides you with a list of all your transactions, with the Pending tab listing any request to send money that you might have received.
UPI and BHIM might be fairly new, but with the Indian government aggressively pushing for cashless economy and transactions, it’s only a matter of time before we see the app being widely used by Indian citizens for sending and receiving money in their daily life.


